


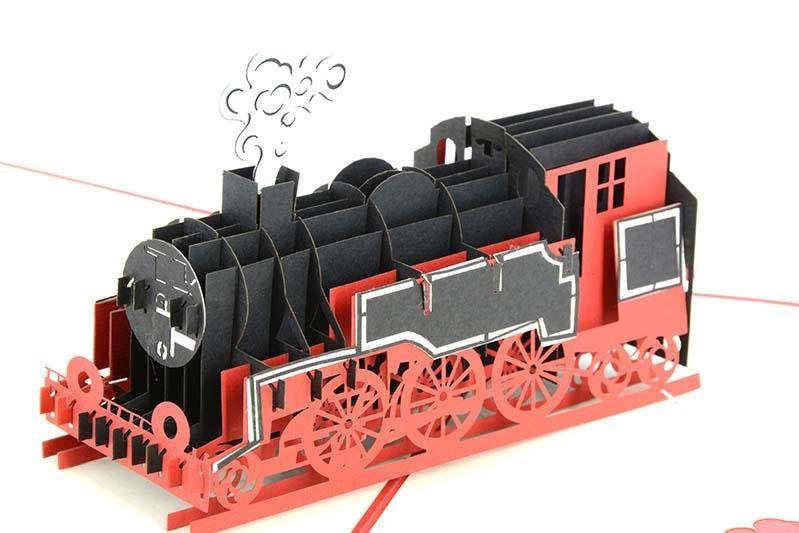

All Aboard for Amazing: The Train Pop-Up Card Template That Will Impress Anyone
Crafting the perfect card can be a challenge. You want something unique, memorable, and that truly captures the recipient’s attention. Forget generic greetings – it’s time to level up your card-giving game with a captivating train pop-up card! This isn’t just a card; it’s an experience, a miniature work of art that will delight anyone, from kids to train enthusiasts. This guide explores everything you need to know about the train pop-up card template, helping you create a card that’s sure to impress.
Why Choose a Train Pop-Up Card?
The appeal of a train pop-up card is undeniable. It offers several advantages over traditional flat cards:
- Visual Impact: The 3D element immediately grabs attention, creating a “wow” factor.
- Interactive Experience: Opening the card is an event, unfolding a miniature train scene.
- Versatility: Suitable for various occasions, from birthdays and congratulations to thank you notes and Father’s Day.
- Personalization: Easily customizable with colors, details, and messages to suit the occasion and recipient.
- Creativity Unleashed: Offers an engaging project that combines crafting and engineering.
Understanding the Train Pop-Up Card Template
A train pop-up card template simplifies the creation process. These templates typically come in several formats:
- Digital Download: Available online as PDF files, allowing you to print and cut the template.
- Pre-Cut Kits: Include pre-cut cardstock pieces, making assembly even easier.
- SVG Files: Suitable for use with cutting machines like Cricut or Silhouette, automating the cutting process for precision.
Regardless of the format, the template provides the foundational structure, guiding you in creating the pop-up mechanism and assembling the card’s various components.
Essential Steps for Creating Your Train Pop-Up Card
Creating a stunning train pop-up card requires careful planning and execution. Here’s a step-by-step guide:
Choose Your Template: Select a template that matches your skill level and desired complexity. Consider the size, the details of the train, and the overall design. Research different options to find the one that best suits your needs.
Gather Your Materials: You’ll need the following:
- Template: Printed or pre-cut pieces.
- Cardstock: For the card base and pop-up elements (consider different colors and textures).
- Scissors or Craft Knife: For cutting the pieces.
- Cutting Mat: To protect your work surface.
- Glue: (Liquid glue or glue dots are recommended).
- Ruler: For precise measurements and scoring.
- Bone Folder (optional): For crisp folds.
- Embellishments (optional): Colored pencils, markers, stickers, glitter, etc.
Print and Cut (or Cut with a Machine): If using a digital template, print it onto cardstock. Carefully cut out all the pieces, following the template’s lines. If using a cutting machine, load the SVG file and let the machine do the work.
Score and Fold: Most templates will have scoring lines that indicate where to fold the cardstock. Use a ruler and bone folder (or a dull knife) to create clean, crisp folds.
Assemble the Pop-Up Mechanism: This is the heart of the card. Follow the template’s instructions to assemble the train and its tracks. This often involves folding, gluing, and positioning the train components to create the 3D effect.
Attach the Pop-Up to the Card Base: Carefully glue the pop-up mechanism inside the card base. Ensure that the mechanism folds and unfolds smoothly.
Add Details and Embellishments: This is where you can personalize your card. Add color, draw details like windows and smoke, and add any embellishments you desire. Consider adding a message inside the card.
Let it Dry Completely: Allow the glue to dry thoroughly before closing and giving the card.
Tips for Achieving Impressive Results
- Use High-Quality Cardstock: This will ensure a professional-looking card that holds its shape.
- Precise Cutting and Folding: Accuracy is key for a smooth pop-up action. Take your time and be precise.
- Experiment with Colors and Textures: Choose colors and textures that complement each other and enhance the visual appeal.
- Consider Adding a Background Scene: Create a more immersive experience by adding a landscape or background to your card.
- Practice: Create a test card first to familiarize yourself with the process before making the final version.
Conclusion: Choo-Choo-Choose to Impress!
The train pop-up card template offers a fantastic opportunity to create a unique and memorable card. By following the steps outlined above and utilizing the tips provided, you can craft a stunning card that will impress anyone. So, gather your supplies, unleash your creativity, and get ready to create a miniature masterpiece! Happy crafting!
Frequently Asked Questions (FAQs)
1. Where can I find train pop-up card templates?
You can find templates on various websites, including Etsy, Creative Market, and specialized crafting websites. Search terms like “train pop-up card template PDF,” “train pop-up card SVG,” or “train pop-up card kit” will help you find options.
2. What skill level is required to make a train pop-up card?
The difficulty level varies depending on the template. Beginner-friendly templates are available with simpler designs and fewer intricate details. More advanced templates may require more experience with cutting and assembly.
3. Can I customize a train pop-up card template?
Yes, absolutely! You can customize the card by changing the colors, adding embellishments, and writing a personalized message. You can also modify the template itself, if you have the skills, to add extra details or design elements.
4. What type of glue is best for pop-up card assembly?
Liquid glue or glue dots are generally recommended for pop-up card assembly. Liquid glue allows for some flexibility in positioning the pieces, while glue dots offer a quick and clean application. Avoid using too much glue, as this can cause the card to stick.
5. How long does it take to make a train pop-up card?
The time required varies depending on the complexity of the template and your experience. A simple template might take a few hours, while a more intricate design could take several hours to complete. Allow ample time for cutting, folding, assembling, and decorating.
